
In real-world applications, agentic workflows cannot just follow a straight line of steps. To build responsive systems, our graph needs to make decisions. Conditional routing is the LangGraph feature for this. It lets the output of one node decide which node runs next.
In this blog, we build a social media customer service agent that routes incoming tweets by their sentiment. The agent uses a local DeepSeek-R1 model for sentiment analysis. We wrap the model with a Pydantic structured schema, then apply conditional routing to generate tone-appropriate responses.
Before we start, we should know the core graph components. See the Introduction to LangGraph and Stateful Workflows guide as a prerequisite.
Environment and Model Setup
Ensure you have pulled the deepseek-r1 reasoning model locally using Ollama:
ollama pull deepseek-r1On Linux/macOS:
ollama pull deepseek-r1Important
Check this model's license on HuggingFace before any commercial use.
Import the required classes to define State, Pydantic schemas, messages, and graph senders:
from typing_extensions import TypedDict, Literal
from langgraph.graph import StateGraph, START, END
from langchain_ollama import ChatOllama
from langchain_core.messages import HumanMessage, SystemMessage
from pydantic import BaseModel, Field

# Configuration
BASE_URL = "http://localhost:11434"
MODEL_NAME = "deepseek-r1"

llm = ChatOllama(model=MODEL_NAME, base_url=BASE_URL)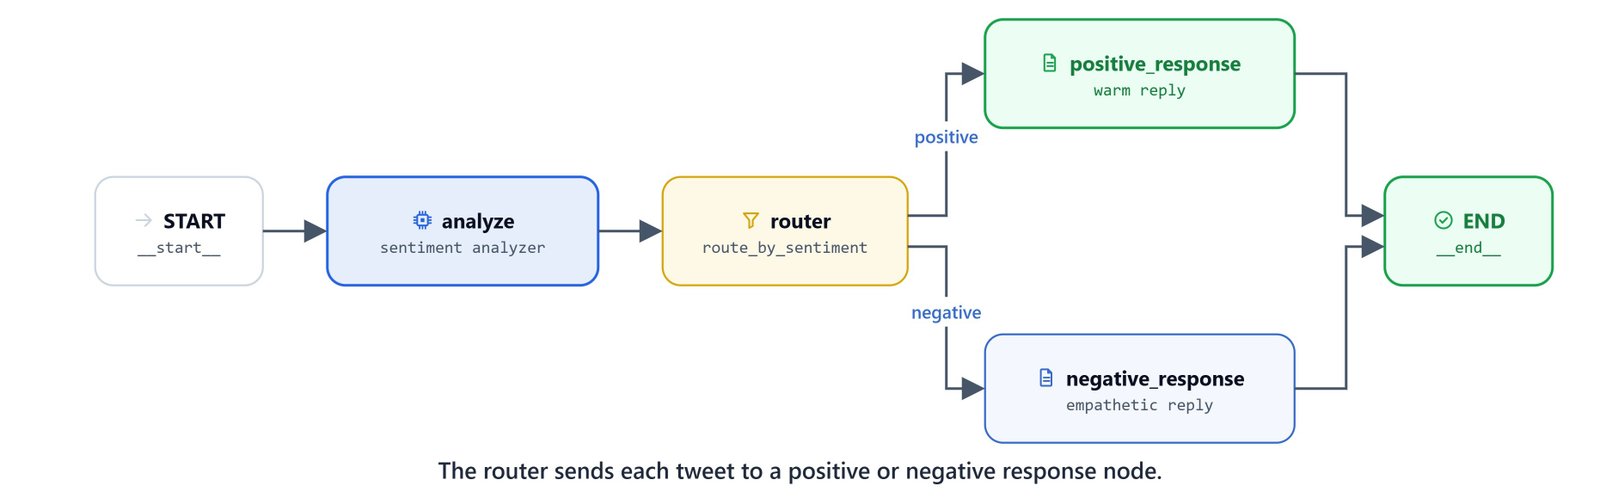
Defining Structured Output Schemas
To make sure our router gets clean data instead of free-form text, we define a Pydantic schema for the sentiment output. This forces the model to return JSON that matches specific types and descriptions.
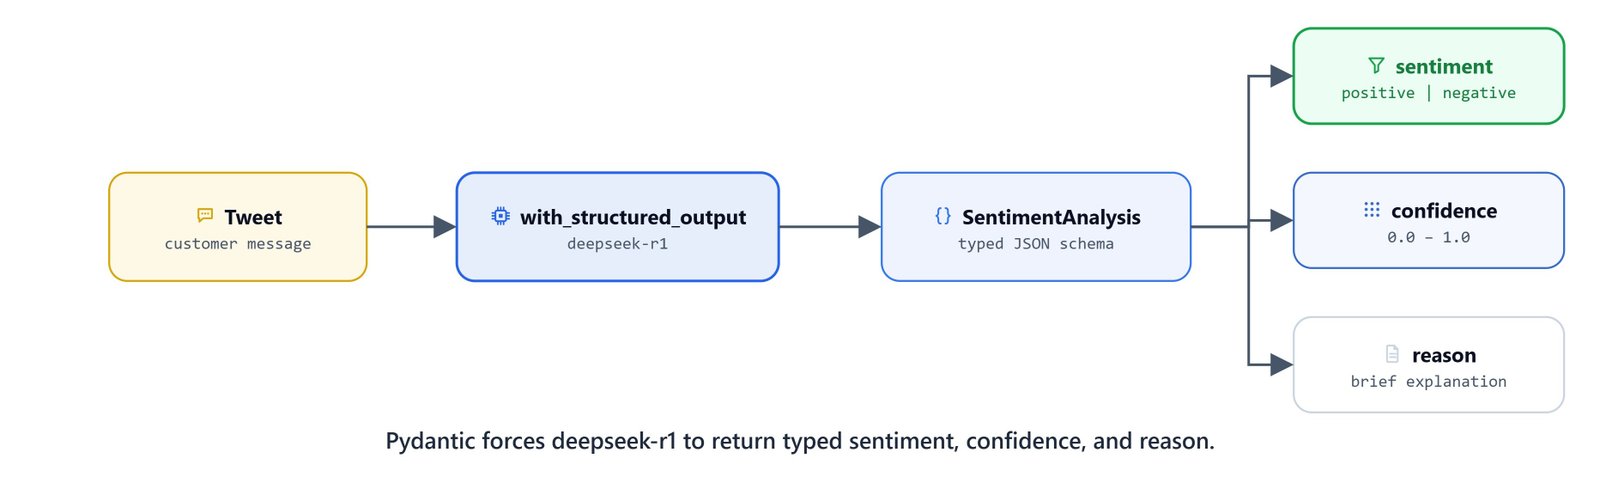
class SentimentAnalysis(BaseModel):
    sentiment: Literal["positive", "negative"] = Field(
        description="The sentiment classification either positive or negative"
    )
    confidence: float = Field(
        ge=0, le=1.0, description="Confidence score from 0.0 to 1.0"
    )
    reason: str = Field(description="Brief explanation")
Defining the Graph State
Next, declare the schema of the shared graph state. It tracks the original tweet, the sentiment and confidence score, and the final response tweet.
class SentimentState(TypedDict):
    original_tweet: str
    sentiment: str
    confidence: float
response_tweet: strCreating Custom Nodes
Custom nodes run the step-by-step logic of the workflow. The first node, analyze_sentiment, passes the tweet to the structured LLM wrapper to classify the feedback:
def analyze_sentiment(state: SentimentState):
    tweet = state['original_tweet']
    print(f"analyzing customer tweet: {tweet}")

    structured_llm = llm.with_structured_output(SentimentAnalysis)

    messages = [
        SystemMessage(
            "Analyze sentiment and provide the structured output. Use 0 to 1.0 scale for confidence. lower is negative and higher is positive"
        ),
        HumanMessage(tweet)
    ]

    analysis = structured_llm.invoke(messages)
    print(f"Sentiment Analysis is done:\n{analysis}")

    return {
        'sentiment': analysis.sentiment,
        'confidence': analysis.confidence
    }
We can test the sentiment analyzer node function in isolation with a sample state:
state = {'original_tweet': "Just launched my new product!"}
analyze_sentiment(state)analyzing customer tweet: Just launched my new product!
Sentiment Analysis is done:
sentiment='positive' confidence=0.9 reason='The message expresses excitement about launching a new product, indicating a positive sentiment with high confidence due to the enthusiastic tone and lack of negative indicators.'
{'sentiment': 'positive', 'confidence': 0.9}Here, we can see the model return a typed result: positive sentiment at 0.9 confidence.
Now, define the two response nodes. Each reply adapts its tone to the confidence score of the sentiment analysis:
def generate_positive_response(state: SentimentState):
    print(f"current state in positive response node: {state}")

    messages = [
        SystemMessage(f"""Generate a warm response to this positive tweet under 280 chars.
                      Confidence: {state['confidence']}. High confidence means be enthusiastic otherwise be friendly."""),
        HumanMessage(state['original_tweet'])
    ]

    response = llm.invoke(messages)
return {'response_tweet': response.content.strip()}def generate_negative_response(state: SentimentState):
print(f"current state in negative response node: {state}")
messages = [
SystemMessage(f"""Generate an empathetic response to this negative tweet under 280 chars.
If Confidence {state['confidence']} is very low then be empathetic otherwise
be understanding."""),
HumanMessage(state['original_tweet'])
]
response = llm.invoke(messages)
return {'response_tweet': response.content.strip()}Implementing Routing Logic
The routing function does not modify the graph state. Instead, it reads a state key (like sentiment) and returns the exact name of the node the graph should run next.
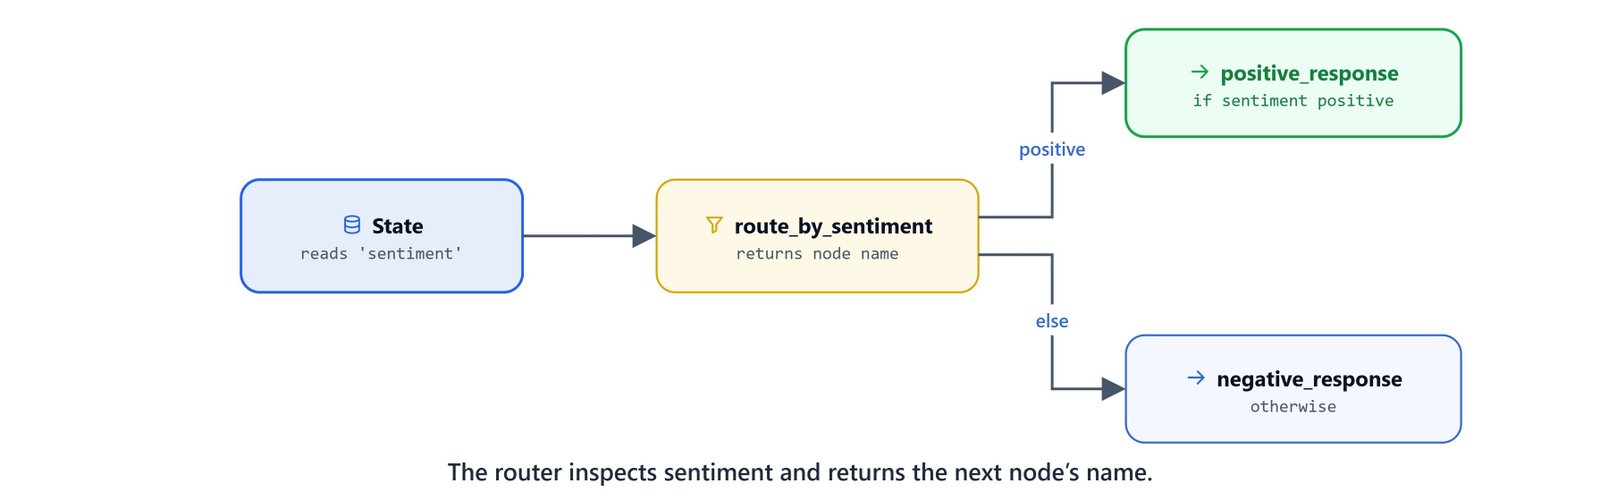
def route_by_sentiment(state: SentimentState):
    if state['sentiment'] == 'positive':
        return "positive_response"
    else:
        return "negative_response"
Composing the Router Graph
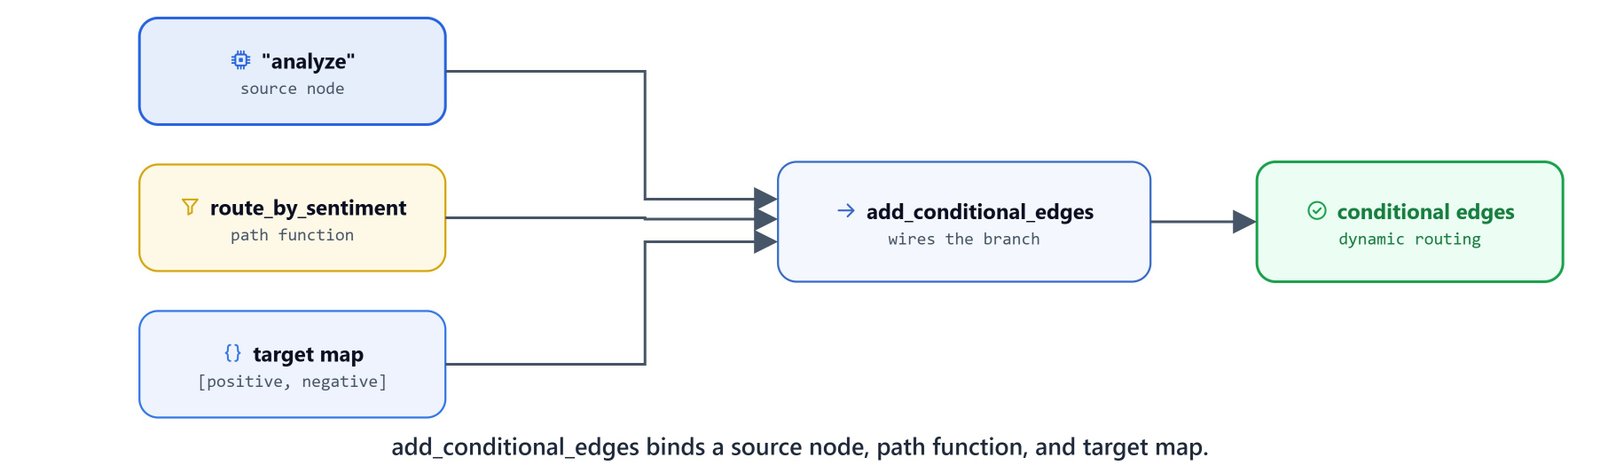
To define conditional branching in the graph builder, we use builder.add_conditional_edges().
This method takes:
- Source node: the node whose completion triggers the decision (here,
"analyze"). - Path function: the routing function that returns the next step (
route_by_sentiment). - Map: a list or dictionary of the possible target node names (
["positive_response", "negative_response"]).
def create_router_graph():
    builder = StateGraph(SentimentState)

    # Add nodes
    builder.add_node("analyze", analyze_sentiment)
    builder.add_node("positive_response", generate_positive_response)
    builder.add_node("negative_response", generate_negative_response)

    # Establish entry point
    builder.add_edge(START, "analyze")

    # Establish conditional path decision
    builder.add_conditional_edges(
        "analyze",
        route_by_sentiment,
        ["positive_response", "negative_response"]
    )

    # Establish exit points
    builder.add_edge("positive_response", END)
    builder.add_edge("negative_response", END)

    # Compile the graph
    graph = builder.compile()
    return graph
Compile and inspect the graph structure:
graph = create_router_graph()
graph<langgraph.graph.state.CompiledStateGraph object at 0x0000025F26DFFBF0>Invoking the Workflow
Now, test the routing graph with different tweets to check the branch decisions.
Scenario A: Positive Tweet
tweet = "Just launched my new product! the response from everyone has been amazing so far."
result = graph.invoke({'original_tweet': tweet})
resultanalyzing customer tweet: Just launched my new product! the response from everyone has been amazing so far.
Sentiment Analysis is done:
sentiment='positive' confidence=0.95 reason="The text expresses excitement and satisfaction with a strong positive adjective ('amazing') and indicates a broad positive reception ('from everyone')."
current state in positive response node: {'original_tweet': 'Just launched my new product! the response from everyone has been amazing so far.', 'sentiment': 'positive', 'confidence': 0.95}
{'original_tweet': 'Just launched my new product! the response from everyone has been amazing so far.',
'sentiment': 'positive',
'confidence': 0.95,
'response_tweet': "OMG that's awesome! 🎉 Congrats on such brilliant feedback! So happy for you and your community! 🔥"}Here, we can see the positive tweet route to the positive-response node, with an upbeat reply.
Scenario B: Negative Tweet
tweet = "Really disappointed with the service I received today."
result = graph.invoke({'original_tweet': tweet})
resultanalyzing customer tweet: Really disappointed with the service I received today.
Sentiment Analysis is done:
sentiment='negative' confidence=0.1 reason="The statement expresses clear disappointment with the service, indicating a negative sentiment. The use of 'really' emphasizes the intensity of the negative feeling."
current state in negative response node: {'original_tweet': 'Really disappointed with the service I received today.', 'sentiment': 'negative', 'confidence': 0.1}
{'original_tweet': 'Really disappointed with the service I received today.',
'sentiment': 'negative',
'confidence': 0.1,
'response_tweet': "I'm so sorry to hear that! 😔 I hope things can improve soon."}Here, we can see the negative tweet route to the empathetic node instead. This is how conditional routing works. One node classifies the input, a router reads that result, and the graph picks the matching branch.